A studio apartment is one room that has to do the work of three. The difference between a studio that feels like a cramped dorm and one that feels like a real home isn't square footage — it's zoning. Every studio that works follows the same principle: define invisible rooms inside the one room you have.
These seven layouts cover the most common studio shapes. Find yours, steal the logic, and adapt it to your space. All are renter-friendly — no construction, just furniture placement and a few smart buys.
The golden rules of studio zoning
Before the layouts, three rules that apply to all of them:
Rule 1: Every zone needs a boundary. A rug, a bookshelf, a curtain, a lighting change — something that tells your brain "the bedroom ends here, the living room starts." Without boundaries, a studio feels like one big messy room.
Rule 2: The bed is the problem child. Beds are huge and they scream "bedroom." Every good studio layout either hides the bed, zones it hard, or makes it do double duty. This is 80% of studio design.
Rule 3: Sightlines matter more than square feet. When you walk in the door, what do you see? If it's an unmade bed, the whole apartment feels like a bedroom. Arrange so the entry sightline hits your nicest zone — usually the living area.
Layout 1: The classic rectangle (bed at the far end)
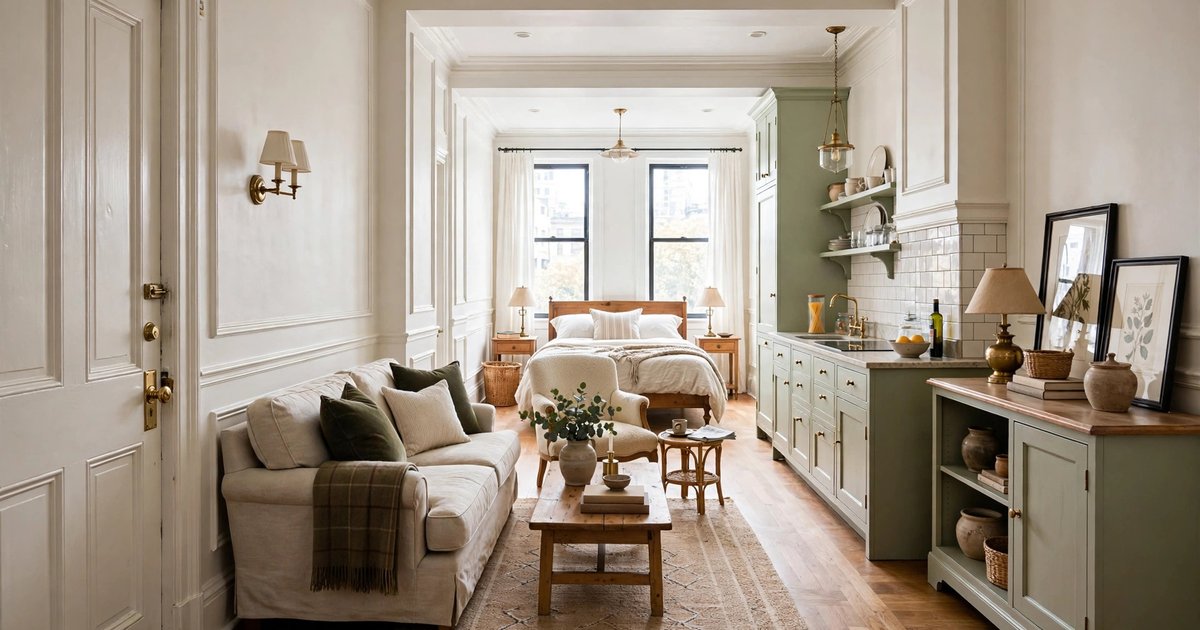
The most common studio shape: a long rectangle with the door at one end and windows at the other. Put the bed at the far window end, living area in the middle, and a small entry zone by the door.
Why it works: the bed gets the best light and the most privacy (farthest from the door), while guests entering see the living area first. Separate the bed zone with a bookshelf perpendicular to the wall — it blocks the bed sightline from the door and gives you storage on both sides.
Layout 2: The square studio (quadrant zoning)
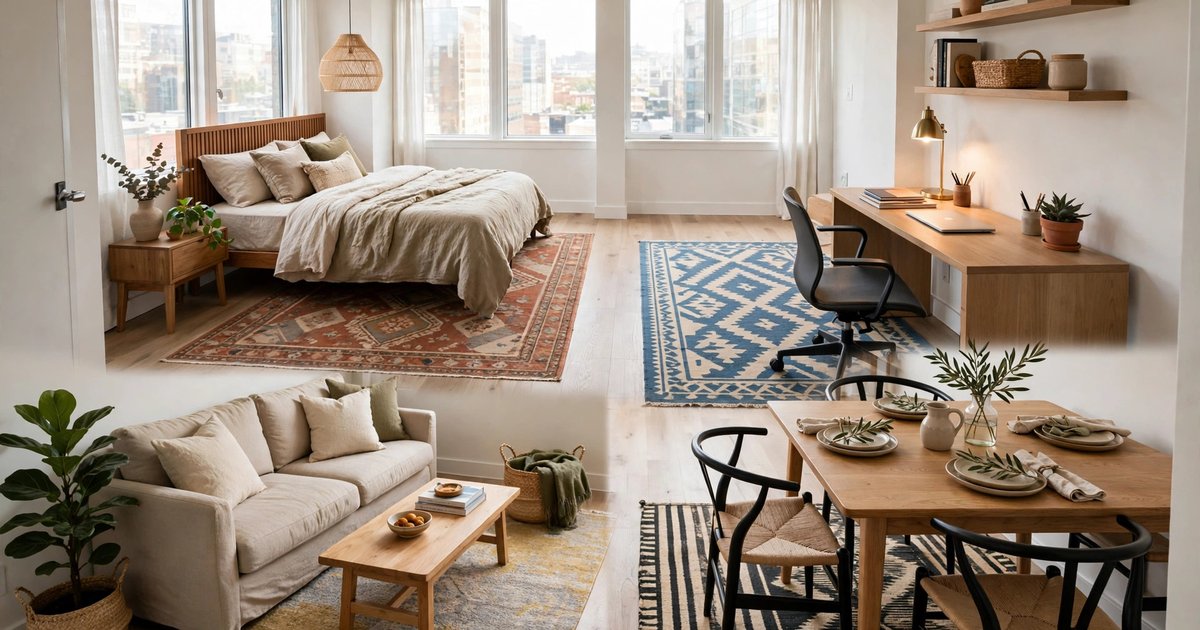
Square studios (roughly 20x20) resist the long-rectangle logic. Instead, divide into quadrants: sleeping in one corner, living in the opposite corner, kitchen/dining along one wall, work nook in the remaining corner.
The key buy here is a large area rug for the living quadrant — it defines the zone more powerfully than any furniture arrangement. Keep the bed in the darkest corner (you sleep there, you don't need the view) and give the living quadrant the windows.
Layout 3: The alcove studio (bed in the nook)
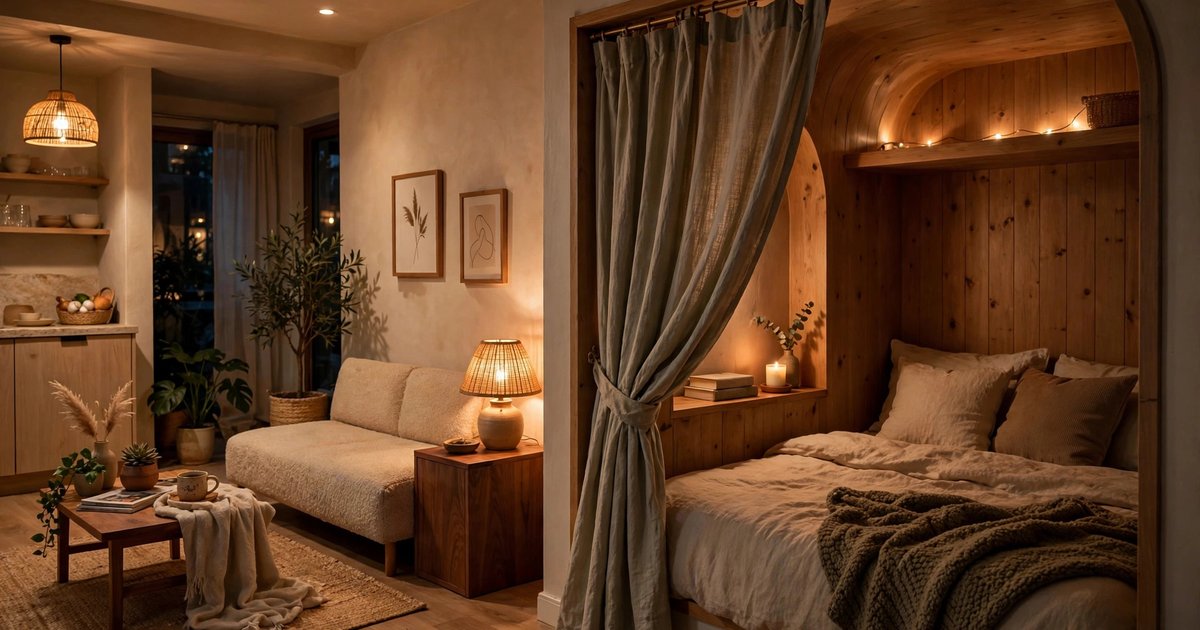
If your studio has an alcove, L-shape, or hallway nook — congratulations, that's your bedroom. Alcove studios are the easiest to make feel like one-bedrooms: hang a curtain across the alcove opening and you literally have a separate room.
Measure the alcove before buying anything. Many fit a full bed but not a queen. A curtain on a ceiling-mounted track ($30) looks far better than a tension rod here and still comes down cleanly at move-out.
Layout 4: The railroad studio (zones in sequence)
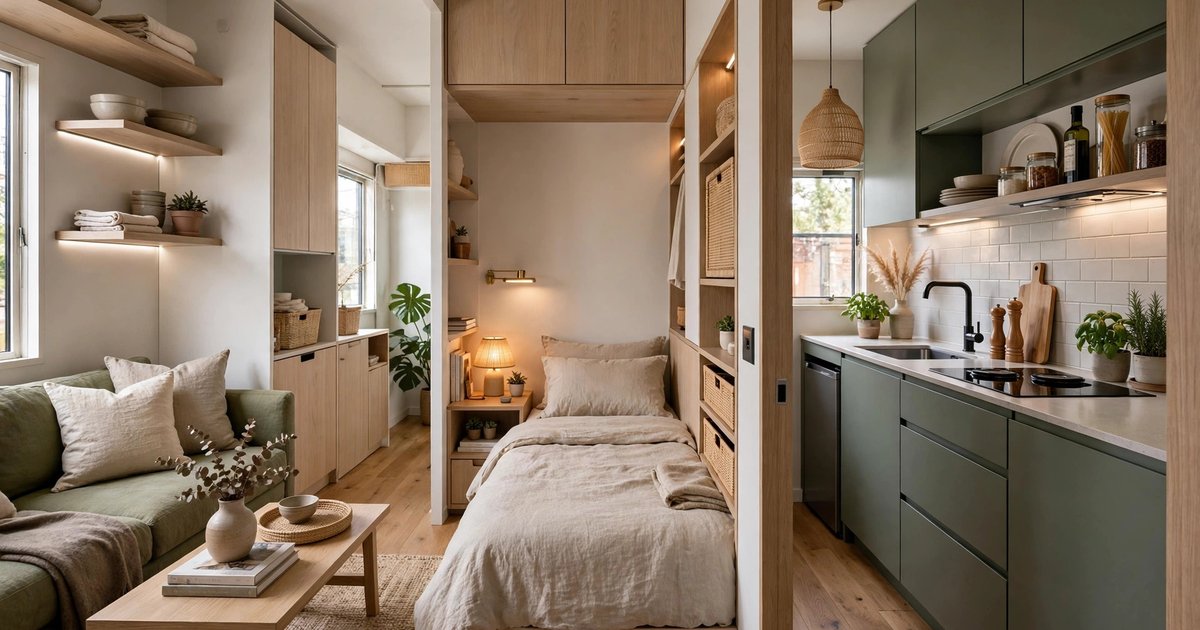
Long, narrow studios where you walk through one zone to reach the next. The sequence matters: entry → living → dining/work → sleeping at the far end. Never put the bed first — you'll walk past it fifty times a day and it will never feel like anything but a bedroom.
Use narrow console tables and wall-mounted shelves instead of deep furniture; in a railroad layout, every inch of width is precious. Keep one side of the "hallway" as clear as possible for the walkway.
Layout 5: The loft studio (sleep up high)
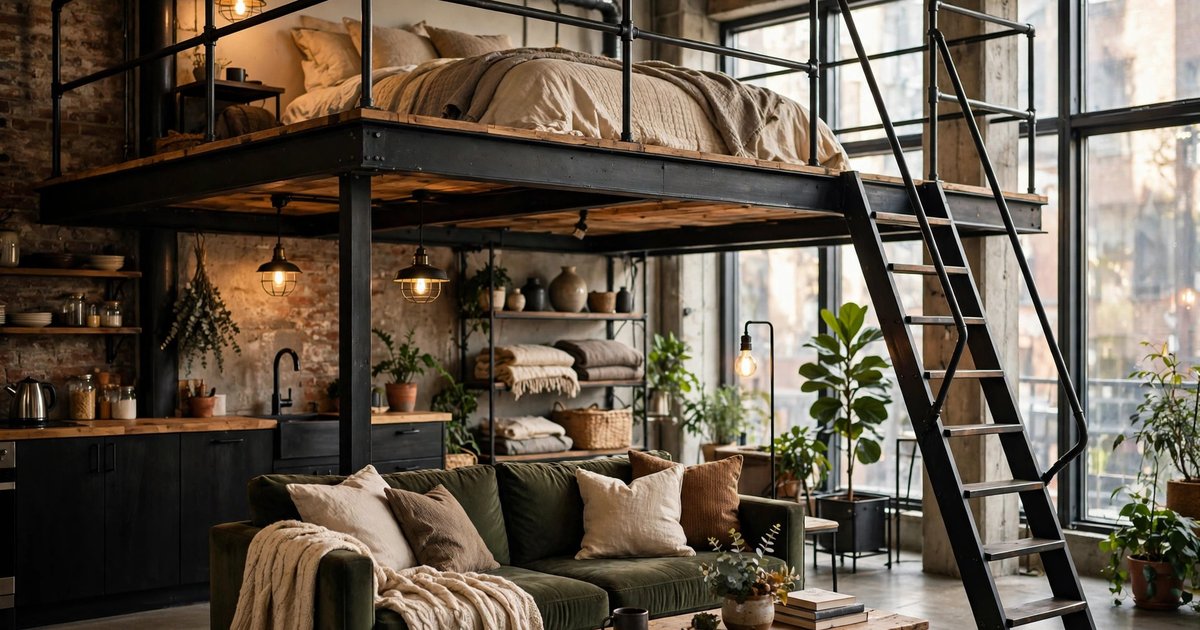
If your studio has 10+ foot ceilings, a loft bed changes everything. Sleeping goes vertical, freeing the entire floor for living. This is the highest-impact layout change possible in a studio.
Safety and lease notes: freestanding loft beds need no wall attachment (renter-safe), but check your lease for loft restrictions and your ceiling height — you need at least 33 inches between mattress top and ceiling to sit up. Budget $200–400 for a sturdy metal loft; this is not the place to cheap out.
Layout 6: The divider studio (open-plan with a wall)
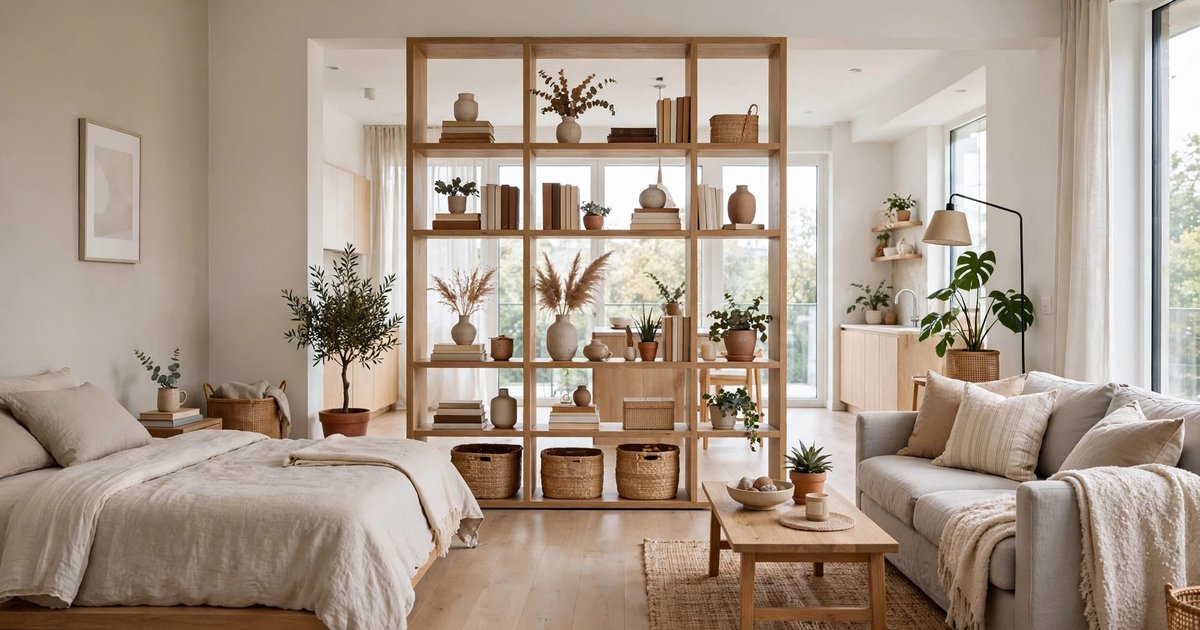
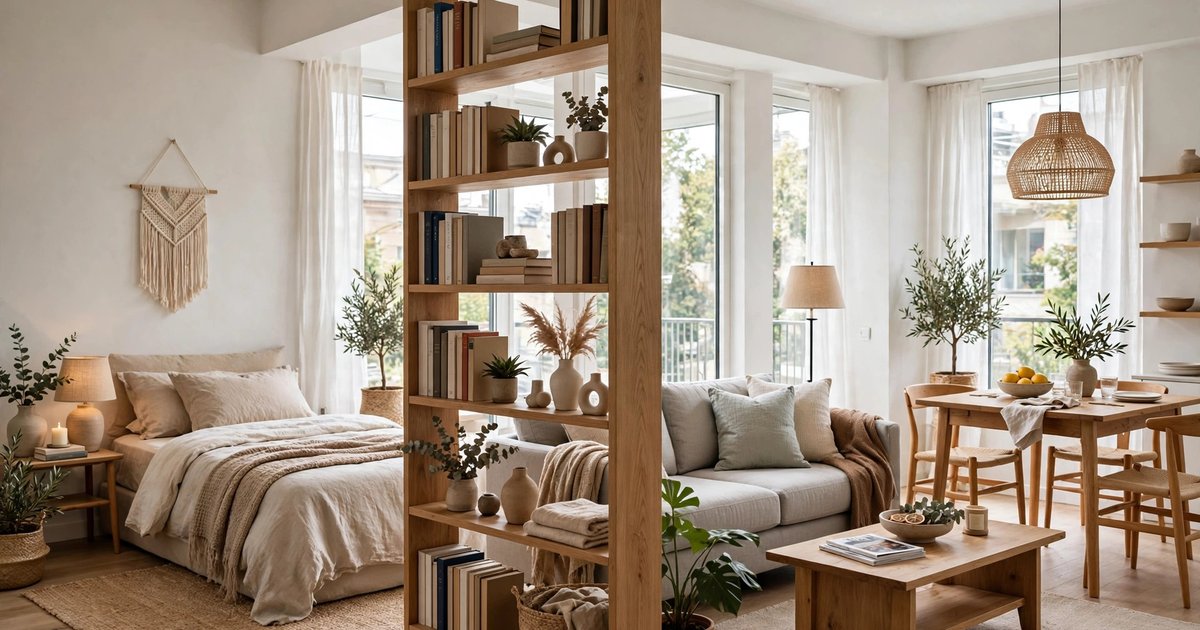
No alcove? Make one. A freestanding room divider — open bookshelf, curtain on a ceiling track, or even a clothing rack with a curtain — splits any studio into "bedroom" and "everything else."
The open bookshelf divider is the best version: it stores things on both sides, lets light through, and costs $60–100. Position it perpendicular to the wall, not floating in the middle — anchored dividers read as architecture, floating ones read as clutter.
Layout 7: The convertible studio (furniture does double duty)
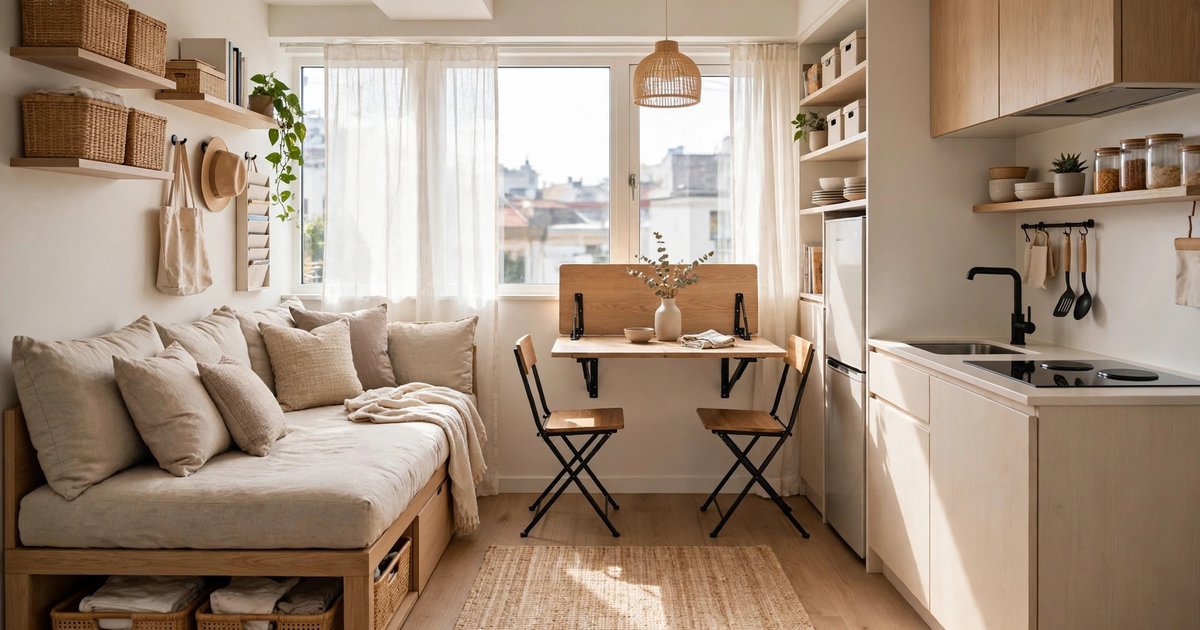
For the smallest studios (under 400 sq ft), static zones waste space. Instead: a daybed that serves as the sofa, a drop-leaf table that's a desk by day and dining table by night, an ottoman with storage instead of a coffee table.
The daybed is the hero piece — dressed with throw pillows by day it reads as a sofa; the bed is simply never "put away." This layout demands discipline (make the bed every morning — it is your sofa), but it makes tiny studios genuinely livable.
The 5 buys that make any studio layout work
Regardless of your floor plan, these five purchases solve the most common studio problems:
- Large area rug (5x7 or bigger) — defines the living zone; the single most important zoning tool. Shop 5x7 area rugs
- Open bookshelf (used as divider) — zones the bed area while adding storage. Shop open bookshelves
- Ceiling-mounted curtain track — for alcoves or DIY dividers; renter-safe. Shop ceiling curtain tracks
- Daybed frame — the studio's hardest-working furniture. Shop daybed frames
- Floor lamp with warm bulb — give each zone its own light source so zones feel separate after dark. Shop arc floor lamps
Frequently Asked Questions
Where should the bed go in a studio apartment?
As far from the front door as possible, ideally near the windows. The entry sightline should hit your living area, not your bed. In rectangular studios that's the far end; in square studios, the darkest corner; in alcove studios, obviously the alcove.
How do I separate the bed area without building walls?
An open bookshelf placed perpendicular to the wall is the best divider — storage on both sides, light passes through, no installation. Alternatives: ceiling-track curtains ($30, renter-safe), tall plants in a row, or a folding screen. Avoid fully opaque dividers in small studios; they block light and make the space feel smaller.
Is a room divider worth it in a 400 sq ft studio?
Yes, if it's a functional divider (bookshelf, storage unit). A purely decorative screen in a tiny studio just eats floor space. Every divider should store something, or it's clutter with extra steps.
What's better for a studio: a sofa bed or a daybed?
A daybed, for daily use. Sofa beds are for guests — the fold-out mechanism wears out with daily use and they're uncomfortable as sofas. A daybed with a good mattress and throw pillows works as both every single day with zero conversion effort.
How do I make a studio feel less like one big room?
Three things: rugs to define floor zones, separate light sources per zone (overhead off, lamps on), and one vertical divider between sleep and living areas. That combination convinces your brain it's moving between rooms, which is what actually creates the feeling of spaciousness.
Can I have a work-from-home setup in a studio?
Yes — treat the desk as its own micro-zone. A small wall-mounted drop-leaf desk ($60) folds away after hours, which matters psychologically: seeing your work setup all evening destroys the "home" feeling. If space allows, face the desk toward a wall or window, never toward the bed.