A fresh Christmas wreath looks like something only a florist can make, but it is one of the easiest festive projects there is. The materials cost less than a shop-bought wreath, the whole thing takes about an hour, and the result — real pine, eucalyptus and cedar on your door — smells like Christmas in a way no artificial wreath ever will. Best of all, it is completely renter-friendly: it hangs from an over-door hook and comes down in January without a trace.
You do not need florist skills, special tools or a garden full of greenery. A supermarket bunch of eucalyptus, a few stems from a garden centre, and the offcuts from a Christmas tree will do it. Here is the whole process, step by step, for a first-time wreath maker.
1. Gather your greenery and supplies
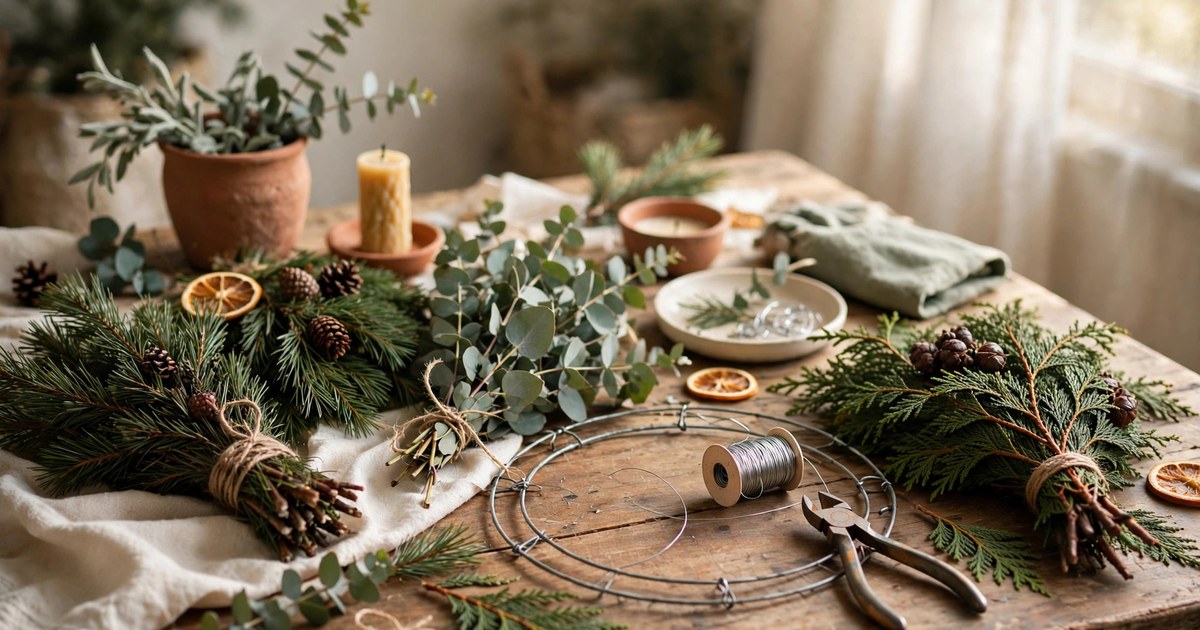
Start with the shopping list, which is short. You need a wire wreath frame — the flat, ring-shaped kind from a craft store or garden centre, usually under $5 — a roll of florist wire or paddle wire, and sharp secateurs or strong scissors. For greenery, buy one large bunch of eucalyptus from the supermarket, one bunch of pine or fir, and one bunch of something softer and lighter, like cedar or olive branches. A few dried orange slices, pinecones and a length of ribbon finish the list.
The mix matters more than any single stem. Pine gives structure and the classic Christmas smell, eucalyptus adds soft blue-green colour and a lovely scent, and cedar or olive gives the feathery, trailing texture that makes a wreath look full rather than flat. Buy more greenery than you think you need — a full wreath uses a surprising amount, and running out halfway through is the one mistake that will stall the project. Everything else on the list is cheap, reusable and easy to find, which is exactly why this is a beginner project and not a florist one.
2. Cut the greenery into small bundles
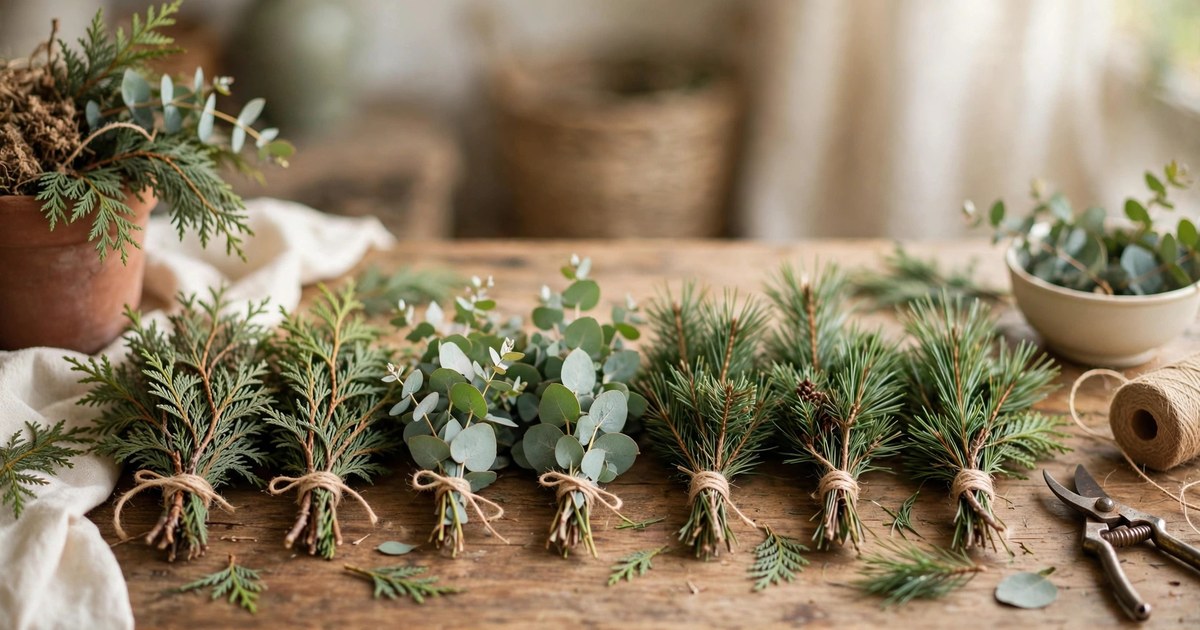
Once you are home, cut all the greenery into pieces about 15 to 20 centimetres long — roughly the length of your hand. Strip the leaves from the bottom few centimetres of each stem so you have a clean handle to wire onto the frame. Then group the pieces into small mixed bundles: two or three stems of pine, one of eucalyptus, one of cedar, fanned slightly so the bundle has a soft, natural shape rather than a stiff, parallel one.
Bundling is the step that makes the whole project manageable. Instead of wiring dozens of individual stems onto the frame, you wire ten or twelve bundles, and each bundle already looks like a tiny bouquet. Make all your bundles before you touch the frame — it turns the assembly into a quick, rhythmic job rather than a stop-start one. Lay the bundles out in a row, longest at the back, and keep a few spare stems aside for filling gaps at the end. If a bundle looks thin, add a stem; if it looks wild, trim it. There is no wrong answer here, only fuller or sparser.
3. Wire the first bundle to the frame
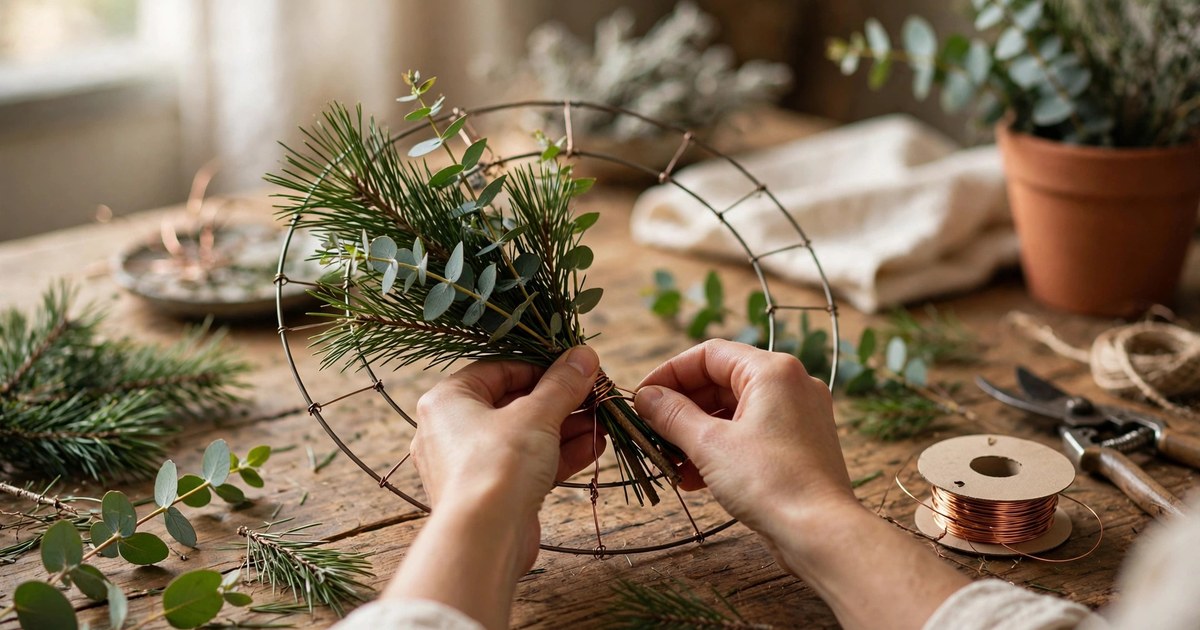
Take your wire frame and your roll of florist wire. Do not cut the wire — keep it on the roll and work with the whole length, wrapping it around the frame and the bundle's stems several times, pulling snugly but not so tight that you snap the stems. Lay the first bundle on the frame with its stems pointing in the direction you will work around the ring — pick clockwise or anticlockwise and stick to it for the whole wreath — and wire it firmly in place.
This first bundle is the anchor, so take a moment to get it right. It should sit flat against the frame, not stick out at an angle, and the foliage should point outward from the ring rather than inward toward the hole. Once it is wired, give it a gentle tug: it should not move. If it does, wrap the wire twice more. The rest of the wreath builds on this bundle, so a wobbly start means a wobbly wreath. Do not worry about how it looks yet — the first bundle always looks lonely. It will not stay that way.
4. Work around the ring, overlapping each bundle

Now work your way around the frame, adding one bundle at a time, each one overlapping the stems of the previous bundle. This is the key technique: the foliage of each new bundle covers the wired stems of the last one, so by the time you finish, no wire is visible at all. Keep the bundles close together — gaps are the enemy of a full-looking wreath — and keep the direction consistent, so the whole wreath flows one way around the ring.
As you go, step back every few bundles and look at the wreath from arm's length. You are aiming for an even, full ring with no bald patches and no bundle sticking out further than the rest. If a gap appears, tuck a spare stem into it and wire it in place. If a bundle looks too long, trim it to match its neighbours. The wire stays on the roll the whole time, wrapping around frame and stems at each bundle, and you only cut it when you reach the last bundle. Halfway around, the wreath will start to look like something real — that is the moment most beginners realise they can actually do this.
5. Close the ring and tidy the shape

The last bundle is the trickiest, because it has to tuck under the foliage of the first bundle to close the ring neatly. Lift the first bundle's foliage gently, slide the last bundle underneath it, wire it in place, and let the first bundle's leaves fall back over the join. Cut the wire, twist the end around the frame, and tuck it in so nothing sharp sticks out. Then hold the wreath up and turn it slowly, looking for gaps, bald spots and stray stems.
Tidying is a matter of small corrections, not big ones. Trim any stem that sticks out beyond the ring's silhouette, tuck loose ends back into the foliage, and fill any thin patch with a spare stem wired in from behind. Do not over-trim: a fresh wreath should look like it grew, not like it was manufactured. A slightly wild edge is charming; a perfectly round, flat wreath looks shop-bought, and you did not spend an hour making a shop-bought wreath. When the ring looks full and even from every angle, it is done — the greenery part, at least.
6. Add dried oranges and pinecones

Now the decoration, and the rule is restraint. A fresh greenery wreath is already beautiful; the extras are accents, not the main event. Wire in three or four dried orange slices, spaced evenly around the ring, using short lengths of florist wire pushed through the fruit and twisted around the frame behind it. Add three or four small pinecones the same way, tucking them into the foliage so they sit naturally rather than perched on top.
Odd numbers and even spacing are the whole secret here. Three oranges and three pinecones, spread around the ring, will look deliberate and balanced. Five of each will look busy. Resist the urge to add baubles, glitter and ribbon all at once — pick one or two accents and let the greenery do the rest. If you want a touch of colour, a few small red berries wired in among the foliage will do it without overwhelming the natural look. Step back after each addition and ask whether the wreath still looks like greenery first and decoration second. If the answer is yes, you are done.
7. Tie on a ribbon and a hanging loop

A ribbon transforms a wreath from a craft project into a finished piece, and it is the easiest step of all. Cut a generous length of wide ribbon — velvet, grosgrain or simple satin in deep red, forest green or gold — and tie it into a bow at the bottom of the wreath, wiring the bow's centre to the frame so it stays put. Let the tails hang long, about 20 centimetres, and cut the ends at an angle for a finished look.
Then add the hanging loop: a short length of wire or sturdy twine twisted around the top of the frame, forming a loop you can hang from an over-door hook or a removable adhesive hook. Test the hang before the wreath goes on the door — hold it up by the loop and check it hangs straight and does not tip forward. A wreath that hangs crooked will annoy you every time you walk past it, and the fix is usually just moving the loop a centimetre to one side. This is also the moment to check the weight: a fresh wreath is heavier than it looks, so make sure your hook is rated for it.
8. Hang it and keep it fresh

Hang the wreath on the inside of your front door using an over-door hook — no damage, no drilling, and it comes down cleanly in January. If you want it on the outside, check that your building allows it and that the wreath is sheltered from direct wind and rain, which will strip it faster. Either way, keep it away from radiators and direct sunlight, which dry fresh greenery out in days.
Keeping it fresh is simple: mist the foliage lightly with water every two or three days, and the wreath should last three to four weeks — easily through Christmas and into the new year. Eucalyptus dries beautifully and keeps its shape, so even as the pine fades, the wreath still looks good. When January comes, compost the greenery, keep the frame and the wire for next year, and store the ribbon with your other decorations. Next December, the whole project takes half the time, because you already know you can do it.
A Wreath You Made Yourself
A fresh wreath made from grocery store greenery costs a fraction of a shop-bought one, takes about an hour, and looks better than most of what you can buy — because it is fuller, fresher and unmistakably yours. The skills involved are minimal: cutting, bundling, wiring in one direction, and knowing when to stop decorating. Every step forgives a mistake, and the final product hides a multitude of small ones under its own foliage.
Start with the frame, the wire and three bunches of greenery, and give yourself a free hour. By the end of it, your door will smell like Christmas, and you will have a new December tradition that costs almost nothing and impresses everyone who walks through the door.
Frequently Asked Questions
How much does it cost to make a fresh Christmas wreath?
A homemade wreath typically costs $15 to $25: a wire frame under $5, florist wire a few dollars, and three bunches of greenery from a supermarket or garden centre. That is often less than half the price of a comparable shop-bought fresh wreath, and the frame and wire are reusable year after year.
How long will a fresh homemade wreath last?
With light misting every two or three days and kept away from radiators and direct sun, a fresh wreath lasts three to four weeks — easily through Christmas. Eucalyptus dries gracefully and holds its shape, so the wreath still looks good even as the pine fades toward January.
Can I make a wreath without a wire frame?
Yes — a coat hanger bent into a circle works as a frame in a pinch, and some people build wreaths on a base of bent willow or grapevine. A proper wire frame is easier for beginners, though, because it is flat, sturdy and has rings to wire onto. Frames cost under $5 and last for years.
What greenery is best for a beginner's wreath?
A mix of pine or fir for structure, eucalyptus for soft colour and scent, and cedar or olive for feathery texture is the most forgiving combination. All three are available at supermarkets and garden centres in December, they wire easily, and they hide mistakes well. Avoid very stiff or very sparse foliage for a first wreath.